
Chapter 3: Working with Files
Show Files
Entering the command SHWFC (Show File Contents) or selecting the option 1. Show File from the main menu allows the user to view or print the edited file contents. The Show File *SELECT contents screen appears.
NOTE: You can type SHWFC or CHGFC directly on the command line to display or change a file at any time without loading FileScope.

Show File *SELECT contents
|
Option |
Description |
|---|---|
|
File |
Name =The name of a file F4 = Prompt File/Member/Viewpoint list F9 for previous = Retrieve a list of previous file names |
|
Library |
Name = Library where the file is located *LIBL = Search the library list to locate the file (default) *CURLIB = Current library |
|
Member |
Name = Name of the file member *FIRST = The first member in the file (default) F4 = Prompt File/Member/Viewpoint selection screen |
|
ViewPoint |
Name = The name of the Viewpoint to be used *DFT = If a Viewpoint with an identical name to the current file name exists it is used, otherwise the DDS of the file is used (default). *NEW = The DDS of the file is used F4 = Prompt File/Member/Viewpoint selection screen |
|
Run the ViewPoint |
*YES = Run the selected Viewpoint *NO = Do not run the selected Viewpoint (default) |
|
Use Key Sequence |
*YES = Keyed files are accessed in their key sequence (default) *NO = File is accessed in its physical sequence |
Navigating through the display screen
|
Option |
Description |
|
Control |
T = Displays the first record of the file B = Displays the last record of the file S = Splits the screen into two parts, allowing the user to work with two different files at the same time. K=Key F4 = Prompt list of key fields |
|
1st.Fld. |
Select the first field to appear at the file. |
|
Scan |
Enter a field name to perform a search for, or press F4 to prompt a list of fields. |
|
Test |
Enter the operator that you wish the scan to perform. Press F4 to prompt a list of fields. |
|
Value |
Enter a value to scan in the file. |
|
Auto |
Y = Automatically apply the field scan for all processed records, works on a specific data in field. N = Apply the field scan for all processed records only if scan is requested |
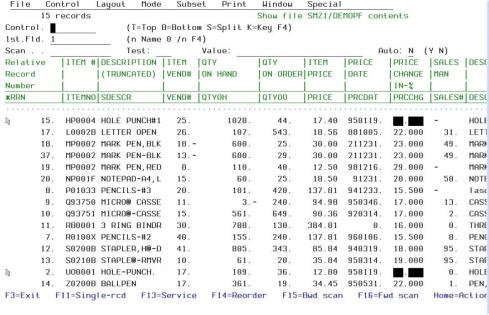
Top Line
Drop-down Menu, see Chapter 7: Drop-down Menu on page 1 for more details.
Second Line
This line shows the number of records, the file name, library, and member name.
Control
The control field is used to move directly to a new position in the file by: key, relative record number within a file relative to the current position or to the beginning/end of the file.
Titles
The field column heading is displayed along with the field name. Several dummy fields have been added automatically to provide more data on the displayed records.
-
*RRN (Relative record number) – The physical position of the record in the file.
-
*RCD (Record string) – The entire record is one character string.
-
*FMT (Format name) – The name that the record format that the record belongs to. This field is added only if the file contains more than one record format.
Data
The data obtained from the first 12 records. The data has been edited according to the file specifications. Each numeric field contains a decimal point.
Decimal errors or non-displayed characters appear as --.--.
Hexadecimal Representationau
To display data together with its hexadecimal values, press F21. To restore the original display, press F21 again.
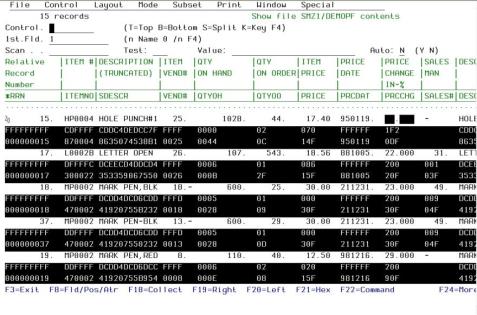
Hexadecimal representation
Hexadecimal representation can be used in both multi-record mode and single-record mode.
Hexadecimal representation remains in effect for all subsequent screen displays and for the PRINT option until toggled off.
Scan
Perform an advanced search in the file according to Field Value Scan, Decimal-Error Scan, and Invalid Date Scan parameters. The first entry is the field name. The value *RCD can be used to represent the record string.
-
Control – The control field is used to move directly to a new position in the file by: key, relative record number within a file relative to the current position or to the beginning/end of the file.
-
Test – Enter the operator that you wish the scan to perform:
EQ = Equal
NE = Not Equal
GT = Greater than
GE = Greater than or Equal to
LT = Less than
LE = Less than or Equal to
The following values are valid for character fields only:
ST = Starts with a string
CT = Contains a string
Combining both *RCD and CT searches the entire record string for the specified value.
-
Value – This field contains the value that the field is compared to or these special values *DE (or *DECIMAL-ERROR) or *ID (or *INVALID-DATE)
-
*DE (Decimal error) – The field is checked to see if it contains a decimal error. The only possible tests can be EQ and NE, if the combination of *RCD *EQ *DE has been entered. All numeric fields can be checked accordingly.
-
*ID (Invalid Date) – Scan for invalid dates in regular (Packed, Signed, Alpha) fields.
-
Auto – With auto you can stop the scan after a specific amount of records you want.
Specify Scan
If using *RCD, *EQ, and *ID to scan, you are requested to specify which fields are date fields, and what structure they are stored in.
Quick Pattern Scan
Use the empty line between the data and the field names to perform a quick scan of specific criteria, and press F16 to apply. The results show at the first data-line.
This scans for values that are entered in the reserved line above the edited data. Enter each character of the pattern directly above the character against the one to be compared in the scanned records. The pattern can include “wildcards”. Use the “~” for a blank and a “¬” for “not a blank”. These replacement characters are the default and can be changed; see Appendix C. Product Defaults for more details. While the scan is being carried out, a scan status window appears showing the number of records scanned. To terminate the scan press the ATTN key (Esc).
To activate a scan use the following keys:
F15 = Scan Backward
F16 = Scan Forward
F18 = Collect records that match the scan criteria
Display Single Record
To display a single record, press F11 in the Show file screen to view a single record at a time.

Single Record Display
Type N in the Control field to view the next record, or P to view the previous one.
NOTE: Single record mode is Display only
Services
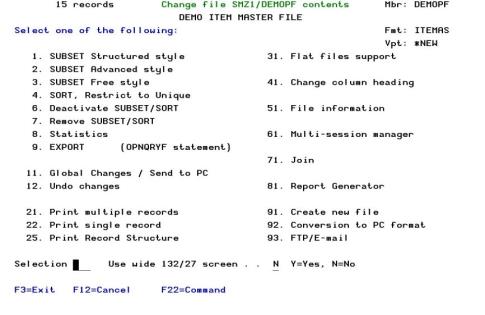
To use the various services available, press F13 in the Show file screen. The Services menu appears.

Work with Subsets
You can set up filters to work with a subset of the file. There are three options of defining the filters:
-
Select 1. SUBSET Structured style in the services menu. Use it like an SQL filter.
NOTE: When using the Start/NStart verbs, there is no need to use the IBM * sign.

Subset definition
You can use F17 and F18 to toggle between structured filtering and advanced filtering or freestyle filtering.
-
Select 2. SUBSET Advanced style in the services menu.
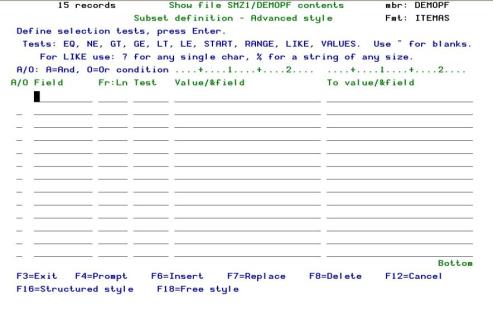
Subset definition – Advanced style
You can use F16 and F18 to toggle between advance filtering and structured filtering or freestyle filtering.
In the advanced style you can use the “or” condition and not only “and”, duplicate some of the fields instead of just using the existing fields and use a condition to look for specific string from position X in the length of Y (Fr:Ln = X:Y).
NOTE: you can move from regular subset to advanced subset, but when moving from advanced subset to regular you could lose some of the information.
-
Select 3. SUBSET Free style in the services menu.
Available in FileScope Platinum only
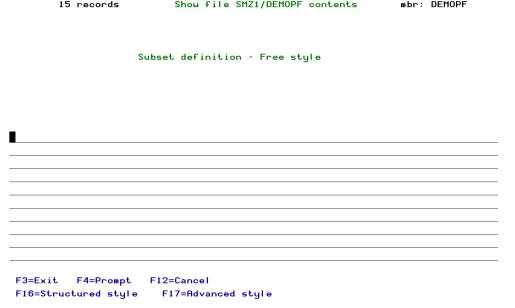
Subset definition - Free style
You can use F17 and F18 to toggle between freestyle filtering and structured filtering or advanced filtering.
Sorting the file
You can select 4. SORT, Restrict to Unique in the services menu, to sort the data. Press F10 to clear any previous sorting definitions, select a new sort sequence and order A/D (ascending descending).
To deactivate the subset or sort definitions, select 6. Deactivate SUBSET/SORT in the services menu. Select 7. Remove SUBSET/SORT to remove the definitions completely.
Additional Services
-
To run statistics such as a record count, select 8. Statistics in the services menu

File Statistics
-
Select 31. Flat file support for customers who have files from System/36. They can load fields from an RPG program and convert the entire file to a DDS file.
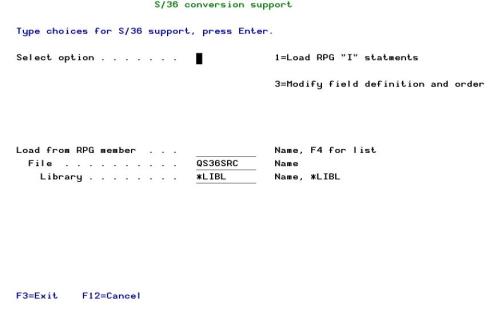
Flat file support
-
Select 51. File information from the services menu to get more information about the file, such as records lock, database relation, physical file members, and so on.

File information
-
Select to work with additional sessions (just like clicking on File at the commands line at the top of the file screen). Press the Attention key to return to the previous session. The multi-Session manager can open up to 16 different sessions.
-
Option , can join up to 9 files without using the same fields’ types and show the results immediately. Press to add a file to join, press to prompt your files list, select the fields that appear on both files.
Available in FileScope Platinum only
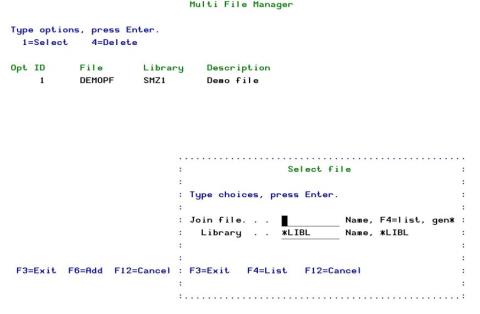
Join Files
-
Select to choose a list of actions to define the report appearance. Select to break every time a specific field is changed and add an action for these breaks, like fields sum, define to the report and automatically count the amount of records in each group.
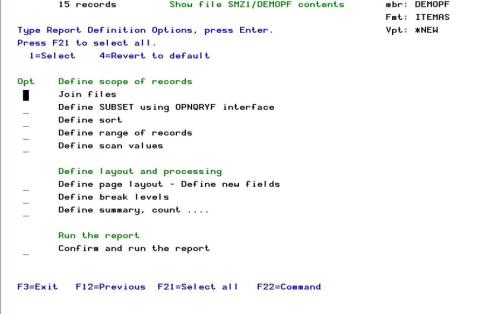
Report generator
-
Select ; to open a Visualizer session for the file on your PC. Enter the parameters to define the Visualizer session
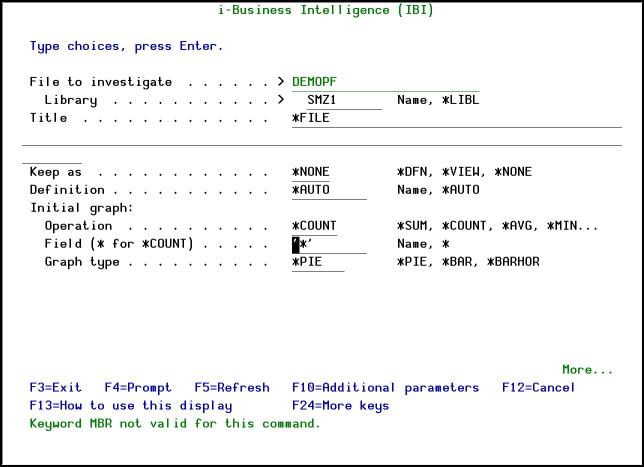
i-Business Intelligence (IBI)
-
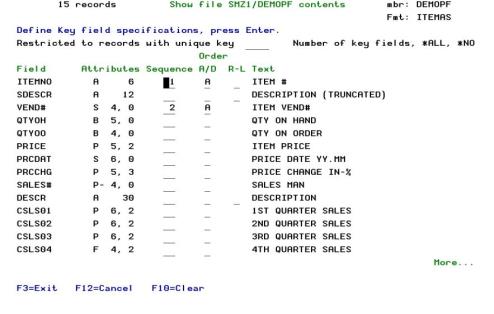
Select ; to create the definitions for a new file. The definitions are those you have already used, except for the option (new order of fields), which allows you to define the keys for the new file.
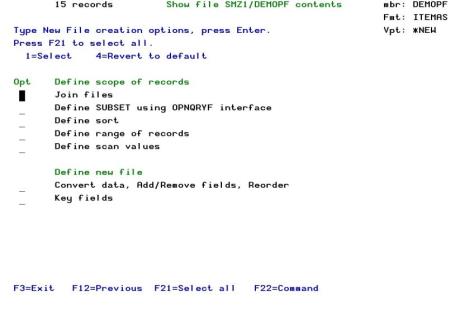
Create a new file
-
Select to convert the file to a PC format such as a text file (.txt) or a Comma Separated Values file (.csv).
-
Select to send the file via FTP or email.

Send file via FTP or Email
Reorder Fields
-
Press in the screen to change the order of appearance of the fields.

-
Press F23=Ignore and select sequence for the fields you want to view.
-
Press F20 to renumber the order of fields to the original order.
-
Press F22 to reorder the key sequence first. Modify the field’s name from this screen.
-
Press F9 to add a new field of any type and any length in a specific position in the record, it shows part of the existing field data in a new field. This option also allows you to add internal fields based on functions; give a new field name, select the character type and length, press F7 to select functions or to create a new one and type it at the formula line. Find the fields names by pressing F4.
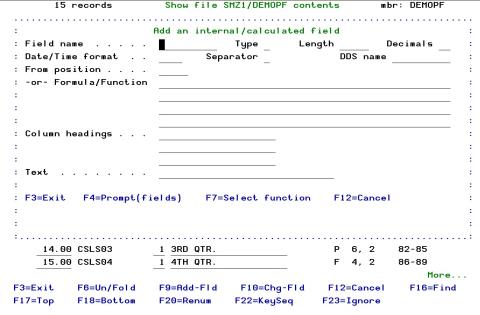
Add a new field
Note: If single record mode has not been previously selected, the default mode is obtained from the system configuration parameter “mode of single record” in CHGFC. Select 81. System Configuration from the FileScope main menu and press F10 to display this parameter. If single record mode has already been selected using F6 or the mode menu (F11) the previously selected mode is used.
Change and Update Files
The CHGFC command provides users with the options of adding, updating and deleting records or record sets. In addition the CHGFC command can create files and write data into them.
To modify a file select 2. Change File in the main menu, or type CHGFC at the command line. The Change file *SELECT contents screen appears.

Change file *SELECT contents

Display full change screen
Navigating through the display screen
Display mode
Press F6 to change the display file mode

Mode
Update
-
Press F10 to update the record’s data (press Enter to move to the next record). When you have finished updating data, press F10 again. A Description of changes line appears, allowing you to add a descriptive text for the update action.

Change File
-
This action can be revoked even after several days. Press F13 for Services in the Change File display and select 12.Undo Changes. A list of the latest changes appears with the changed date, time and the descriptive text. Every changes page is a set of changes and appears separately.
 8
8
Undo Changes
-
Type 8 to view the system’s journal of changes. You can also see the user and the session in which the changes were performed.
-
Type 1 to select the set to revoke and press Enter. The Confirm Removal of Journaled Changes screen appears, type Y to confirm and press Enter.
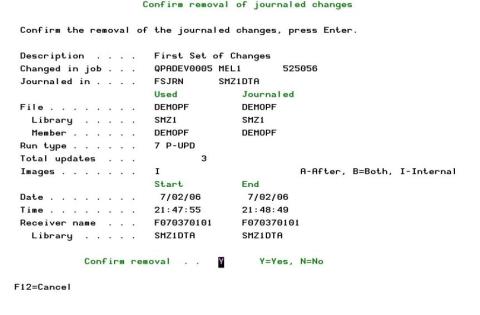
Confirm removal of journaled changes

Operation in Progress
Update Single Record
-
Press F11 in the Change file screen to update one record at a time

Update Single record
-
Type N at the Control line to update the next record, or P to update the previous one. Press Enter to confirm the changes.
Services
-
Press F13=Service in the Change file screen. The Services menu appears.
-
Select 11. Global changes / Send to PC. The global changes menu appears.
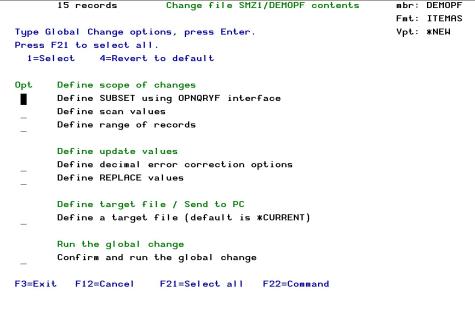
Global changes
-
Defining global subset for the file.
-
Global scan filter values.
-
Define range of records to start and end from which Key. Press F4 to choose from a list of the files’ keys.
-
Define global updates like correcting decimal errors or replacing the fields with zero character.
-
Define replace value, add a permanent number to the end of specific fields, subtract 15% off a value or change the description of the fields to be another field’s data.
-
Confirm the global definitions and types a description of the changes for future option of undo.
-
Select 12. Undo Changes, type 1 to select the Set of changes to revoke.
-
Select 41. Change column heading to change the column headings of the physical file. This is a unique feature of FileScope.
Note:
You can only perform this operation when you have sole access to the file. When the operation starts, the file receives an *EXCL lock until you release it. This may prevent other others from performing their tasks.
The operation cannot be performed on a file which is not either a physical file, or an SQL table, or an SQL view.

Change Column Headings